Linux Logical Volume Manager, as the default disk partitioning scheme. The installer creates three logical volumes by default, besides the non-LVM /boot partition. The three logical volumes, for /home, /, and swap, are the minimum recommended for a desktop installation. The problem with the default installation is that all available disk space is allocated to the logical volumes, living none for future use when it might be needed to grow a partition, or create a new logical volume. This installation guide takes you through the process of editing each logical volume to free up disk space, space that is not needed for the system to run. At the end (of this tutorial), I will show an example of how to resize (grow) a logical volumes, a basic LVM management task.
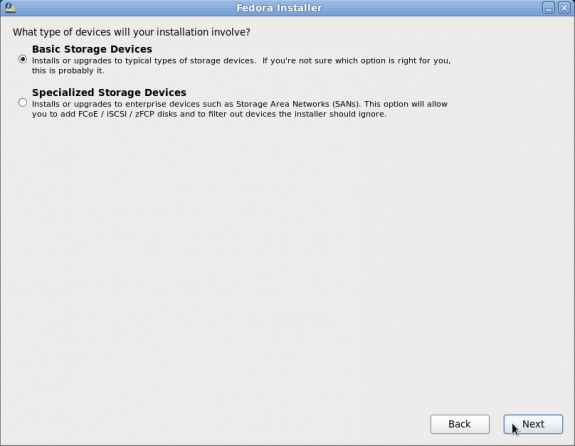
When writing these tutorials, I always like to exclude those images that are not pertinent to the subject matter. And so the first image in this tutorial is taken from the step where disk management starts. The default option is to install to Basic Storage Devices, like you would find on a personal computer. The other option is for enterprise-grade installations. Click Next to continue.
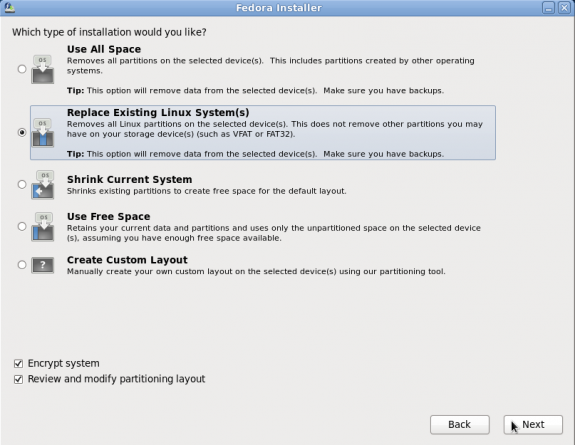
The Fedora installer offers several disk partitioning methods. The default is shown below, and would be ok if Fedora is the only OS you want on the disk. Just like the default, the other options are self-explanatory. Because the objective of this tutorial is to modify the default partitions, be sure to enable “Review and modify partitioning layout.” And to take advantage of Fedora’s one-click, full disk encryption scheme, enable “Encrypt system.” Next.
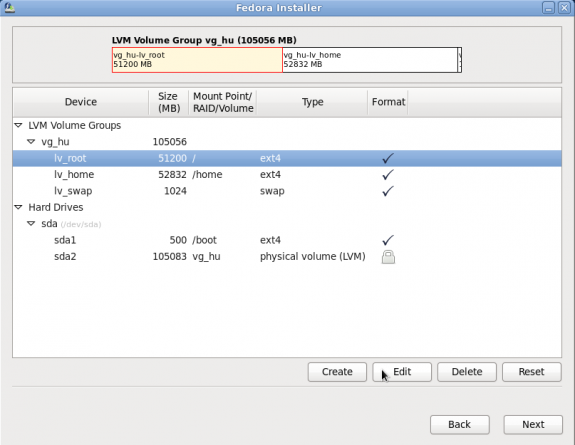
These are the default partitions and logical volumes created by the installer. We have two primary partitions, one of which is for /boot, and the other is the Physical Volume, that is, the primary partition initialized for use by LVM. If you enabled the encryption option as in this example, the Physical Volume will be encrypted. The test system, which was in a virtual environment, had a disk size of 100 GB, all of which the installer allocated to /boot and the three logical volumes. This is where we begin to modify the logical volumes to free up space, leaving just enough on the logical volumes to install the system.
You can see in this example that about 50% of the available disk space was allocated to lv_root, the root file system, and a similar percentage to lv_home. Since a default installation of Fedora 14 uses less than 2.5 GB of disk space, nothing will be adversely affected if you reduce the size of the logical volumes. To start editing the logical volumes, select each and click on the Edit button, or just double-click on the one you want to edit.
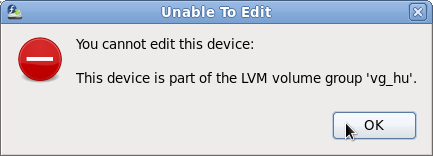
Note: the only entry that is not editable at this step is the physical volume. Try it and you will get the alert shown below.
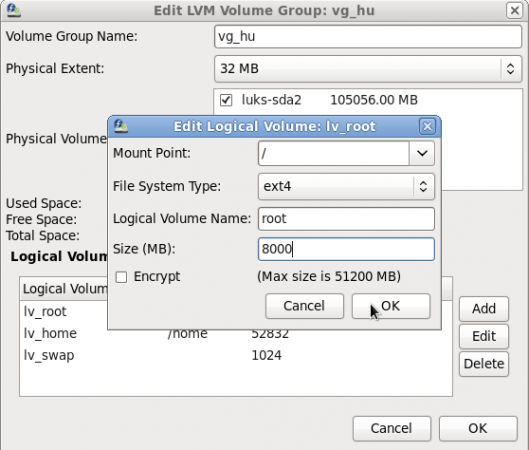
Ok, if you selected any logical volume for editing, the following window will be opened. The first one being edited here is lv_root. The primary goal is to reduce the size, but we can also edit the name of the logical volume. I prefer the logical volume names to be without the lv_ prefix. So lv_root I would rename to just root, lv_home to home, and lv_swap to swap.
Knowing that a new installation of Fedora 14 can be installed on less than 2.5 GB of disk space, reducing the size of lv_root to any value above that should be fine. For this example, I have reduced it to 8 GB. 3 GB should be good too. The name of the logical volume will also be changed as suggested in the previous paragraph.

This is the edited logical volume. Notice the changes from the default. Click OK to close the window and return to the main window. Note that because the physical volume in this example has been enabled for encryption, it is not necessary to encrypt the logical volumes. Doing so would be overkill, but if you are that security conscious, go ahead. Depending on the situation, I would, but in this case, it is not necessary.
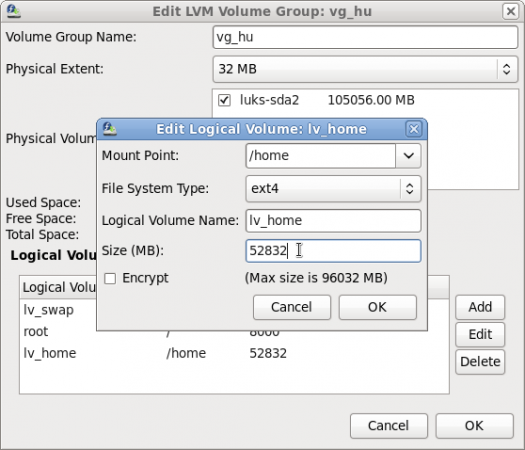
If lv_home is selected for editing, these are the defaults. As with lv_root, the primary item we want to edit is the size.

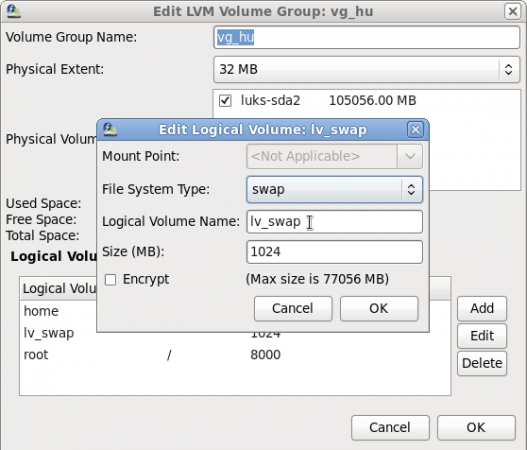
For lv_swap, these are the defaults.
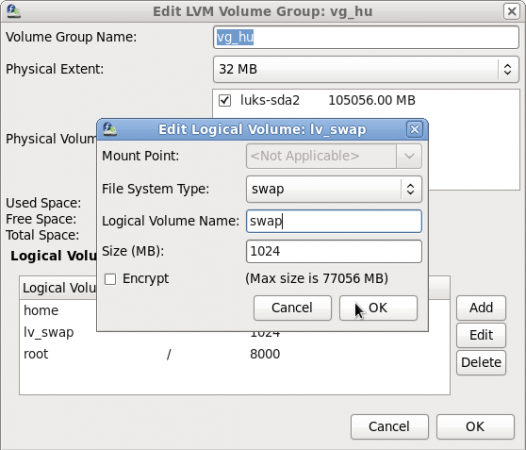
And this is the edited version. For this logical volume, I edited just the name, leaving the size at the default of about 1 GB. Keep in mind that if you do not change the size of swap here, you can only resize it on a running system from the command line. System-config-lvm, the graphical management tool for LVM, does not allow resizing of the swap partition.
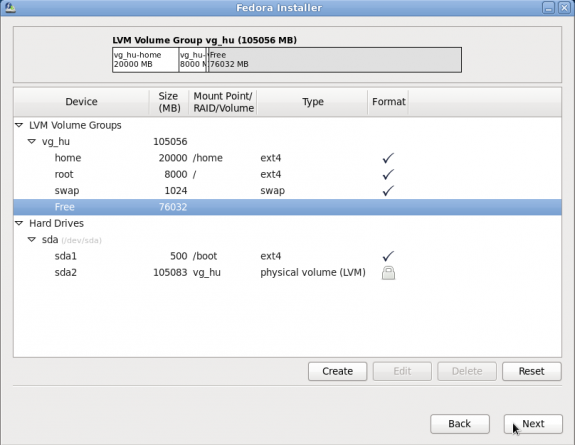
With all three logical volumes edited, this is the new partitioning window. Notice that we now have about 76 GB, roughly 75%, of disk space free. This can then be used to grow or create new logical volumes, if there is a need for it. Click Next to continue with the installation.
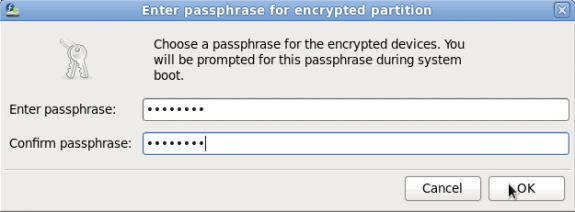
If disk encryption option was enabled, you get this prompt. The passphrase requested here will be used to encrypted the disk.
After the first stage of the installation process has ended, you will be asked to reboot to continue with the second stage of the installation. At the second stage, you will have to create a user, have the option to modify the default boot loader configuration, enable the Network Time Protocol, etc.
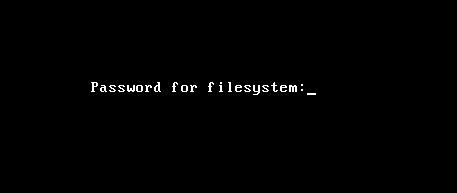
When the second stage has completed and you reboot the computer, the disk encryption passphrase will be needed to unlock the disk, that is, if disk encryption was enabled.
To showcase one advantage, or benefit, of LVM, I will show how easy it is to grow (resize or extend) a logical volume, and I will use the logical volume for /home as an example. Fedora 14 comes with two graphical disk management utilities. One is the GNOME Disk Utility (Applications > System Tools > Disk Utility), and the other is system-config-lvm (System > Administration > Logical Volume Management). Disk Utility is unable to manage encrypted LVM, so the only (graphical) option available is system-config-lvm.
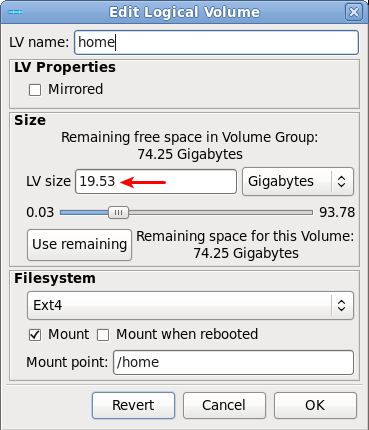
This is the Edit Properties window. The original size of this logical volume is about 20 GB, and the volume group has about 75 GB of disk space free. To illustrate how easy it is to grow this logical volume, I am going to increase the size to 30 GB.
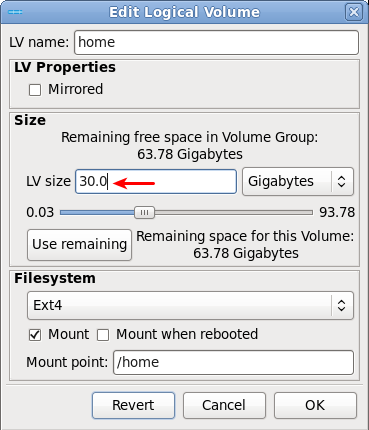
This is the edited size. Click OK and you should see the new size reflected in the main window of system-config-lvm. A df -h or lvdisplay at a shell terminal will also show the new size. Note that with ext4 file system, the resizing is accomplished online, that is, you do not need to unmount the volume before editing the properties.
From the command line, resizing a logical volume is even easier. To accomplish this same task from the command line, all that is needed is this command: lvresize -L +10G /dev/vg_hu/home path-to-physcialvolume. You can use lvextend in place of lvresize and still get the same result.
In just the same manner that a logical volume can be extended, the size of the volume group can also be extended by adding another disk or disk partition to the volume group. That and other more involved tasks will be covered in a future article
When writing these tutorials, I always like to exclude those images that are not pertinent to the subject matter. And so the first image in this tutorial is taken from the step where disk management starts. The default option is to install to Basic Storage Devices, like you would find on a personal computer. The other option is for enterprise-grade installations. Click Next to continue.
Installation options
Disk partition methods
You can see in this example that about 50% of the available disk space was allocated to lv_root, the root file system, and a similar percentage to lv_home. Since a default installation of Fedora 14 uses less than 2.5 GB of disk space, nothing will be adversely affected if you reduce the size of the logical volumes. To start editing the logical volumes, select each and click on the Edit button, or just double-click on the one you want to edit.
Default partitions
Volume edit error message
Knowing that a new installation of Fedora 14 can be installed on less than 2.5 GB of disk space, reducing the size of lv_root to any value above that should be fine. For this example, I have reduced it to 8 GB. 3 GB should be good too. The name of the logical volume will also be changed as suggested in the previous paragraph.
This is the edited logical volume. Notice the changes from the default. Click OK to close the window and return to the main window. Note that because the physical volume in this example has been enabled for encryption, it is not necessary to encrypt the logical volumes. Doing so would be overkill, but if you are that security conscious, go ahead. Depending on the situation, I would, but in this case, it is not necessary.
Edited /root logical volume
Default /home logical volume
This is the edited window. Again, notice the difference from the defaults.
Edited /home logical volume
Default swap logical volume
Edited swap logical volume
Edited partitions
Encryption passphrase
When the second stage has completed and you reboot the computer, the disk encryption passphrase will be needed to unlock the disk, that is, if disk encryption was enabled.
Unlock disk
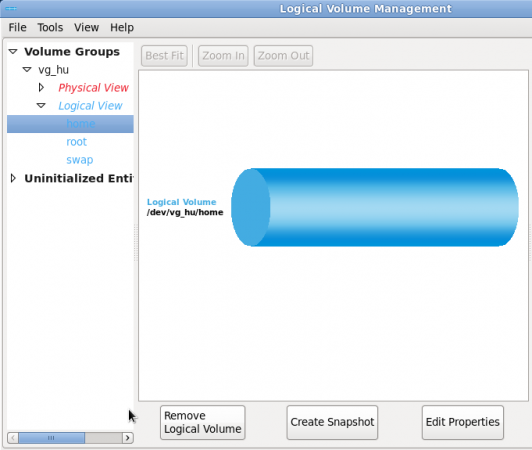
The image below is from the Logical View of system-config-lvm, and the logical volume in focus is for /home. To change the size of this or any other logical volume, just click on the Edit Properties button.
Logical volume view
Original LV properties
From the command line, resizing a logical volume is even easier. To accomplish this same task from the command line, all that is needed is this command: lvresize -L +10G /dev/vg_hu/home path-to-physcialvolume. You can use lvextend in place of lvresize and still get the same result.
Edited LV properties
No comments:
Post a Comment